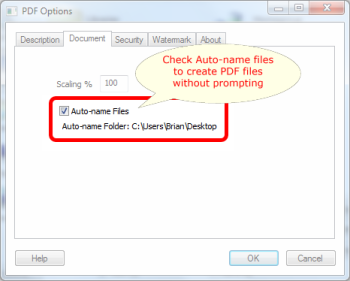
To automatically save PDF files without prompting, you can turn on the Win2PDF Auto-name feature. This is enabled by first selecting the PDF Options... button on the Win2PDF file save window. Then, navigate to the 'Document' tab and you will see the following checkbox for Auto-name Files.

When this option is checked, the Auto-name Folder: shows the location where the new PDF file will be saved. This is the same directory location as the original file that is being printed (it can be changed by navigating to a different file save location on the main Win2PDF file save window). The name of the new PDF file will be the same as the original document with a date and time stamp included. For example, if your original document is named Sales Report.xls, the PDF will be Sales Report [Date] [Time].pdf.
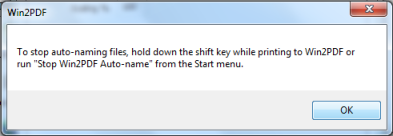
You will also see the following pop-up window when this option is selected:

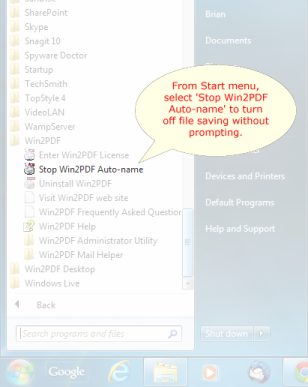
Once Auto-name is enabled, you will no longer see the Win2PDF file save window when you print. To turn off the Auto-name feature and resume prompting for the PDF file save, you will need to either hold down the SHIFT key when printing to Win2PDF, or go to the Windows Start menu and go to the Win2PDF program group. There, you will be able to select 'Stop Win2PDF Auto-name', as shown below.

There are more advanced ways to customize the automatic file save options, including changes to the file name date and time stamps. For more information, please visit the How to Manage file name settings section of the How to use the Win2PDF Admin Utility section of our online help.